Showing posts with label before and after. Show all posts

Thursday, April 30, 2009

DIY: Restoring Garden Furniture

These little babies were destined to become yard art until my neighbor Christy was like "hold the phone," and gave me a little lesson on reupholstering. I don't think I'll be recovering a chair anytime soon, but here's a quick and easy tutorial.

Before:


The seats got waterlogged and rotted:( I'll miss the yellow.

After:


1.


You'll need some ply board for the seat. Sam got underneath and traced the shape on to the board.

2.


Next cut out the shape with a saw.

3.


I washed down the chairs and repainted them to prevent rust.

4.


We used two inch foam board which I cut in to the shape of the seat with a bread knife.

5.


We used vinyl for the seat and cut it. Alternating sides, we pulled the fabric tight little by little and then stapled it to the board.

6.


7.


Screw in to the board from the bottom to secure.

Voila.

© copyright homemade grits

Tuesday, September 2, 2008

Before and After

My Mama and I spent a lovely day together getting our nails done, having lunch with Rachel, and then surprising Sam with a new and improved office! I love decorating with Mama because we always end up with fun results. I'm thankful to have inherited a small chunk of her love of design. I am also thankful to have a Mom that is always there for me and always up for anything. I couldn't love her more!

So, without further adieu here are the before and afters of the office.

Center of Room
{before}

{after}

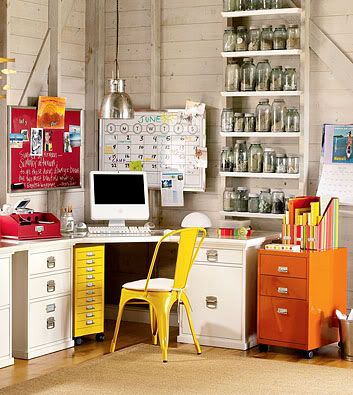
Inspiration

Reality


Desk
{before}

{after}


Bookshelves/Workspace
{before}


{after}


Inspiration


Reality


Bright file cabinet


Inspiration


Sam was so surprised and really loved the way things turned out. I tried to create a retreat for him and a creative space for his leather working! With Mom's help it only took a few hours and now I can breathe in there! Tomorrow I will be so satisfied because I plan on cleaning as long as my feet allow me to.

© copyright homemade grits

Sunday, June 29, 2008

DIY Weekend Edition

I told you that last week Sam and I went to Ikea and one of the things that we bought was the GORM shelf unit to use as a make shift potting bench. We had looked at sheds, rubber bins, and you name it to solve our outdoor storage problem.


When we saw the GORM I was sure that it would be the perfect solution for my gardening supplies. The wood was untreated so Sam had to stain it. We used a color called "Gunstock" which we purchased from Home Depot. That was the most time consuming part of the project. We had to wait for each side to dry before he could stain the reverse.


We bought a galvanized bin, SKRIN, from Ikea to store fertilizer, peat moss, potting soil, and whatever else we buy that comes in a large bag! We also purchased a white bin with lid for bird seed. Sam then screwed several mini hooks in to the shelf for easy access to our tools. I am really excited about how it turned out, especially because the last shelf is the perfect size for our bulky recycling bin!


Total cost: a little more than $100.

© copyright homemade grits

Thursday, May 8, 2008

Spring cleaning

So, I've decided to do a before and after piece. I've always loved these. I first developed my love of organization from a Berenstain Bears book. I loved the way their rooms looked after they cleaned them. Containers, and labels, and order oh my!


Amazon.com

So, not the same as Berenstain bears, I wasn't quite as awed by my own feeble attempts. Let me say, however that it takes a real woman to be so vulnerable as to divulge her flaws for the internet world to see. Let me also say that I sincerely doubt that my friend Jessie or my neighbor/friend Christy have ever had a closet that looked like this in their life. So, without further ado...before....YIKES


and After....


When you live in a tiny cottage storage is definetly an issue. As you all can see this is a multi tasking linen closet that does not exactly fulfill my Martha Stewart hopes and dreams. Because I can still not do a perfect fold on a fitted sheet (my Mom can by the way) I decided to bundle sets of sheets and then put them in a recycled quilt bag. I also moved some of my gift closet items to the linen closet and organized my sweet husband's tools and household items such as light bulbs, putty, etc. All in all it's a step in the right direction. As we prepare for Matilda I am trying to get as much organizing and spring cleaning done as possible. I am so excited to tackle to nursery!

© copyright homemade grits

update: the closet contains the same amount of things as before.